While drill path hierarchies are structurally the same as regular hierarchies, their behavior in the visualization differs when it comes to the expand and collapse and drill functions. Unlike regular hierarchies, drill path hierarchies do not display expand and collapse icons in grid visualizations. Instead, the expand and collapse functions are accessed via the context menu, and the expanded levels are displays in a new column.
Drill path hierarchies, however, do reflect the current hierarchy level in the drop zones, providing additional context to the user.
- Click here to learn how to configure hierarchies in Model
Expand and Collapse
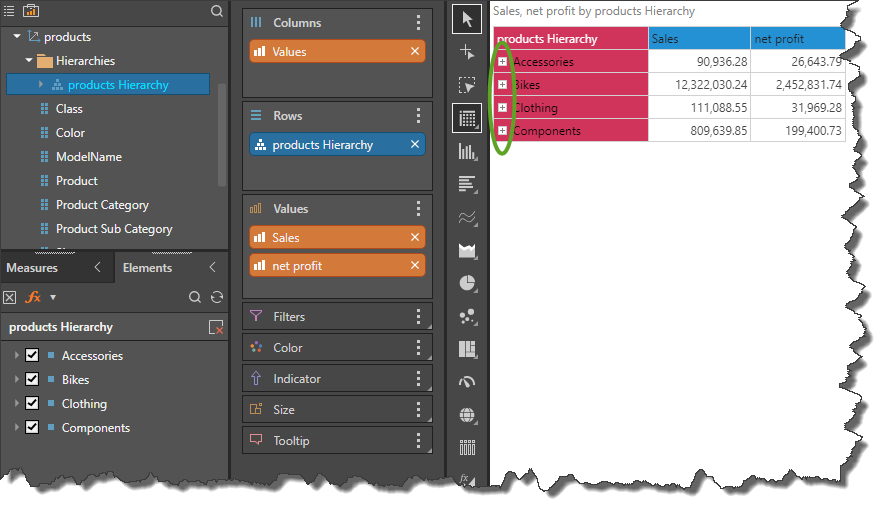
A regular hierarchy added to a grid visual will display expand and collapse buttons; these are used to exposed different levels of the hierarchy within the same column.
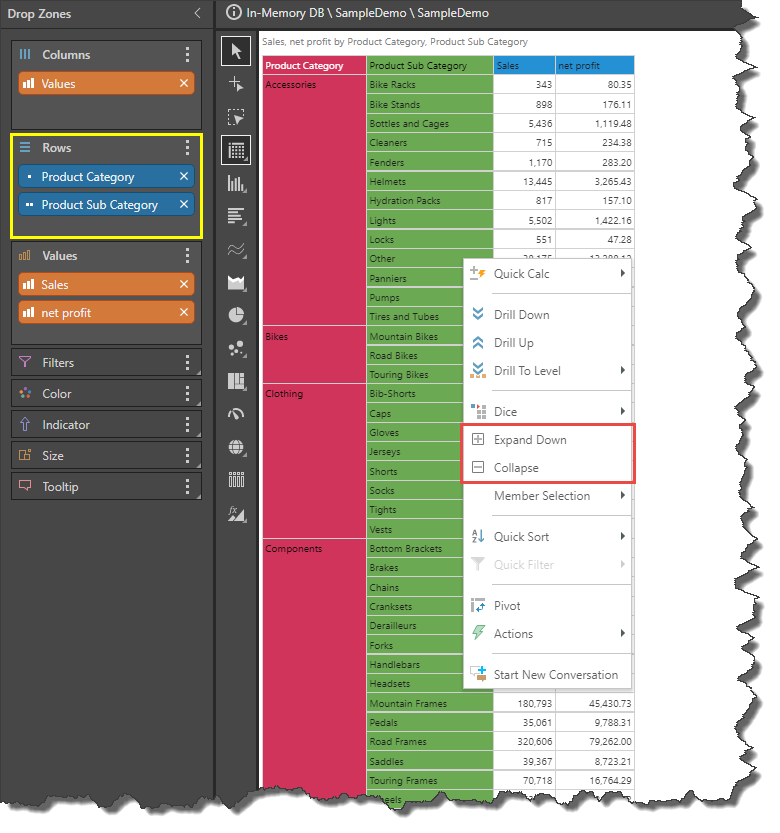
Drill path hierarchies do not feature these expand and collapse buttons; expand and collapse is instead accessed from the context menu (red highlight below) via interactive selection. Unlike regular hierarchies, when a column representing a level of a drill path hierarchy is expanded, the child level is exposed in a new column, beside the column representing the parent level. In the example below, the top level of the hierarchy (red column) was expanded down to expose the second level (in the green column). The exposed hierarchies are reflected in the drop zones, which displays the chips of each level of the hierarchy that are shown in the query (yellow highlight).
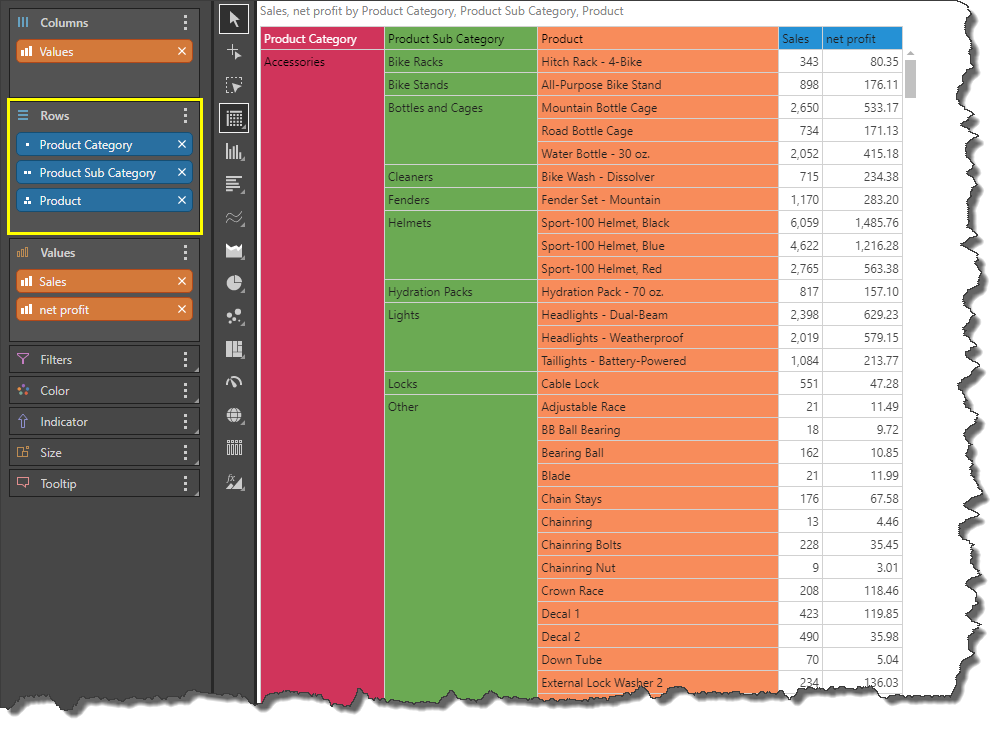
In the image below, the second level was expanded down to expose the third level (Product) in the orange column. The Product level chip is also added to the drop zone (yellow highlight).
Drill
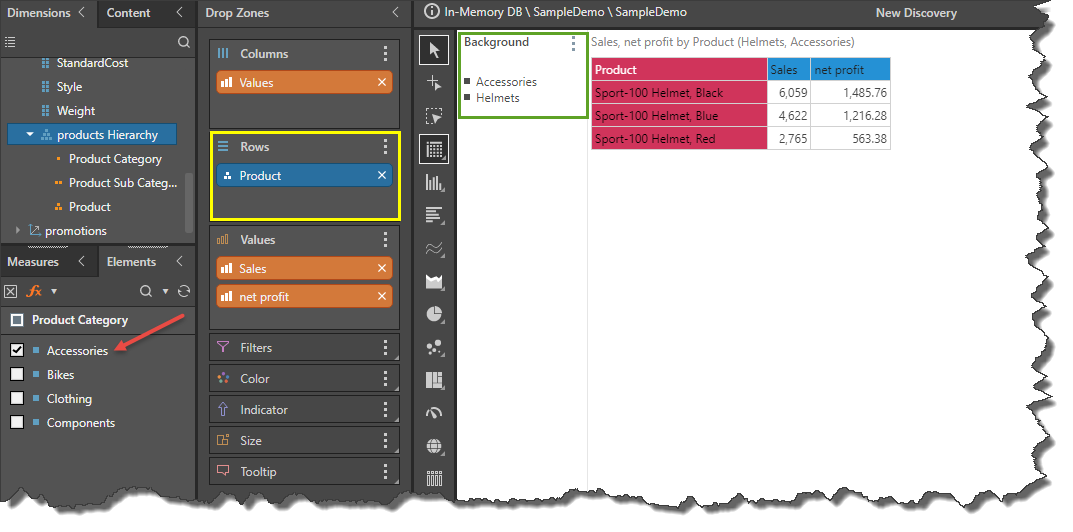
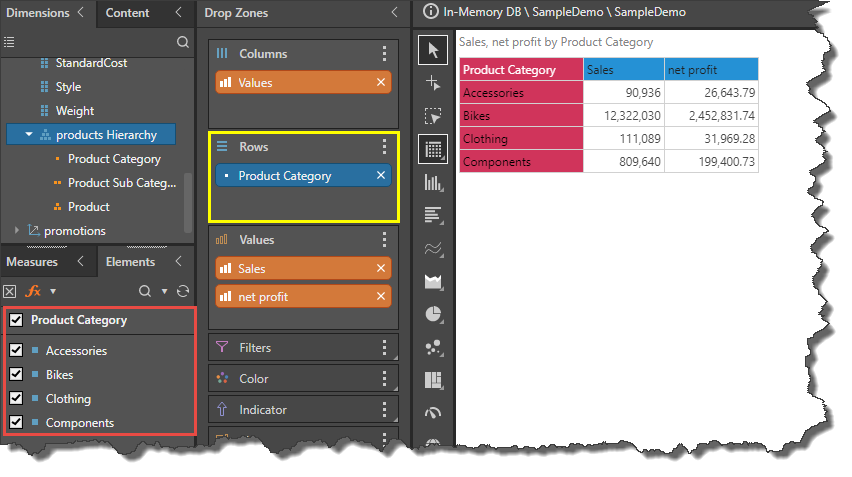
Unlike regular hierarchies, when drilling into a drill path hierarchy, the drill path is reflected in the drop zone, which will display the current level of the hierarchy only (yellow highlight below). The hierarchy's Elements tree will display the currently selected member elements from the top level of the hierarchy: in this example, all member elements from the top level are selected (red highlight).
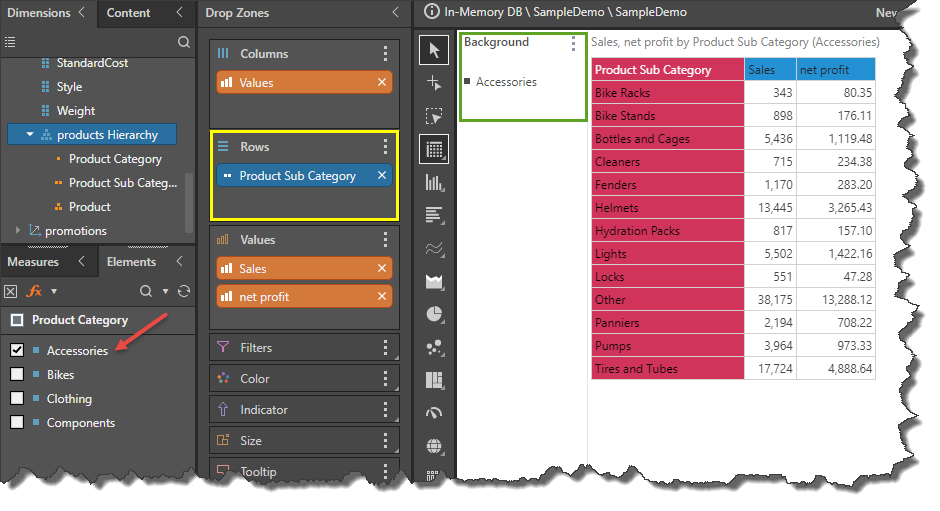
In the image below, drill down was applied on the Accessories member, which is reflected in a few places other than the visualization itself:
- From the Elements tree, we see that only Accessories is selected (red arrow), meaning the user drilled into this member.
- The Rows drop zone contains the hierarchy's Product Sub Category chip, which represented the second level of the hierarchy (yellow highlight). This also corresponds to the row heady in the grid.
- The Accessories member is added to the canvas as a background chip, indicating that only this element was selected from the top hierarchy (green highlight).
In the image below, the user drill down from Product Sub Category to Category, which is the third level of the hierarchy. The user drill into the subcategory member "Helmets". The drill path is again reflected in a few places, aside from the grid, which now displays a row labeled "Product":
- The Elements tree shows that only Accessories is selected from the top level f the hierarchy (red arrow).
- The Rows drop zone now contains the hierarchy's Product chip (yellow highlight).
- The Helmets member was added as a second background chip, showing that the drill path is Accessories > Helmets > Product (green highlight).